Table of Contents
ToggleA properly configured office desk setup isn’t about aesthetics, it’s about building a workspace that supports long hours without wrecking your neck, back, or focus. Whether you’re converting a spare bedroom or carving out a corner of the living room, the difference between a functional setup and a frustrating one comes down to deliberate choices about desk selection, equipment placement, and environmental controls. This guide walks through the practical decisions that turn an empty surface into a productive command center, covering everything from desk dimensions to cable routing to task lighting. Skip the guesswork and build it right the first time.
Key Takeaways
- A proper office desk setup prioritizes ergonomics and functionality over aesthetics, with desk dimensions, monitor placement, and cable routing serving as the foundation for long, productive work sessions without physical strain.
- Choose your office desk based on floor space and workflow needs—standard desks work for single monitors, while L-shaped options provide 50-70% more surface area for multi-monitor setups and distinct work zones.
- Monitor height and distance significantly impact eye strain; position the top edge at or slightly below eye level and maintain 20-30 inches viewing distance, with multi-monitor setups arranged in a slight arc angled 10-15 degrees inward.
- Keyboard and mouse positioning must allow 90-110 degree elbow bend with shoulders relaxed, with the mouse placed directly beside the keyboard to keep wrists in a neutral, straight-line position.
- Effective cable management using under-desk trays, adhesive clips, and labeled cables takes 30 minutes upfront but prevents dust accumulation, maintains safety, and saves troubleshooting time later.
- Task lighting with adjustable arms and 4000-5000K color temperature is essential for reducing eye strain, while overhead lighting should be diffuse and indirect to avoid screen glare and monitor shadows.
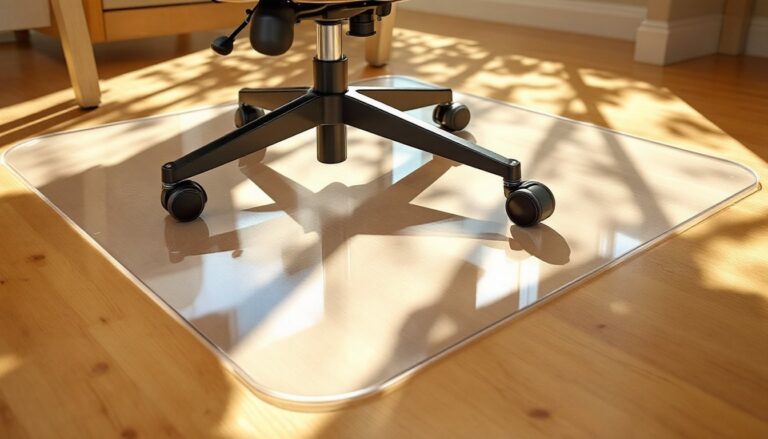
Choosing the Right Desk for Your Space and Work Style
Desk selection starts with three measurements: available floor space, work surface needs, and clearance for movement. A standard rectangular desk runs 48-72 inches wide and 24-30 inches deep, adequate for a single monitor and keyboard, but tight if you’re working with multiple screens, reference materials, or any hands-on tasks like sketching or assembly work.
L-shaped desks offer 50-70% more usable surface area in the same footprint by utilizing corner space. They’re ideal for multi-monitor setups or anyone who needs distinct zones for computer work and paperwork. U-shaped configurations add even more surface but require a dedicated room, figure at least 10×10 feet of floor space to avoid a cramped feel.
Height matters more than most people realize. Fixed-height desks typically sit at 29-30 inches, which works for users between 5’8″ and 6’0″ with standard seating. Anyone outside that range or anyone serious about ergonomics should consider an adjustable-height (sit-stand) desk. These range from manual crank models to electric dual-motor units that move smoothly under load. If you’re building your own, you can find detailed plans for custom desks at sites like Ana White, which offers free plans for various desk styles and skill levels.
Material choice impacts both durability and aesthetics. Solid wood (maple, oak, walnut) handles weight well and ages gracefully but costs more and can warp with humidity changes. Plywood with veneer or MDF with laminate keeps costs down and provides a stable surface: look for at least ¾-inch thickness to prevent sagging under monitor arms or heavy equipment. Metal frames offer the best load capacity and pair well with any top material.
Don’t overlook leg design. Four-leg desks are stable but limit under-desk storage and footroom. Trestle or cantilever designs open up floor space but may wobble if not properly braced. If you’re mounting monitor arms, CPU holders, or cable trays, confirm the desk edge or underside can support the hardware, particle board and hollow-core surfaces won’t hold threaded clamps.
Essential Equipment and Tools for a Functional Workspace
Building a functional workspace means placing equipment where your body can use it for hours without strain. This isn’t about buying the fanciest gear, it’s about positioning what you have so it works with your posture, not against it.
Monitor Placement and Screen Ergonomics
Your monitor’s top edge should sit at or slightly below eye level when you’re seated with your back against the chair. For most people, that puts the center of the screen 15-20 inches below eye level. Position the display 20-30 inches from your eyes, about an arm’s length. Closer causes eye strain: farther forces you to lean forward.
Multi-monitor setups require more planning. Arrange screens in a slight arc so the edges are equidistant from your eyes, and angle each panel inward about 10-15 degrees. If you use one monitor more than the other, place the primary screen directly in front and the secondary off to the side. For two equal-use monitors, center the gap between them to your midline.
Monitor arms are worth the investment. They free up desk space, allow height and angle adjustments on the fly, and improve airflow behind the screens. Most clamp to the desk edge or grommet-mount through a drilled hole. Verify your desk thickness and edge accessibility before buying, some designs won’t work with thick tops or rear lips. Dual-arm models typically support 10-27 inches per screen and up to 20 pounds per arm.
Keyboard, Mouse, and Input Device Positioning
Your keyboard should sit at a height that lets your elbows bend at 90-110 degrees with shoulders relaxed. If your desk is too high, add a keyboard tray, most slide-out trays mount under the work surface and drop the typing plane by 2-4 inches. Look for trays with tilt adjustment: a slight negative tilt (front edge lower than back) reduces wrist extension.
Place the mouse directly beside the keyboard, not forward or angled out. Your forearm and wrist should stay in a straight line during use. If you’re constantly reaching or twisting, your setup is wrong. Consider a compact keyboard (tenkeyless or 60% layout) to bring the mouse closer to your body’s centerline.
Wrist rests help, but only if used correctly, they support your palms during pauses, not while actively typing or mousing. Floating your wrists while working is ideal: resting them on a hard edge causes nerve compression over time.
Cable Management Solutions That Actually Work
Cable chaos isn’t just ugly, it’s a dust trap, a tripping hazard, and a maintenance nightmare. Managing it properly takes 30 minutes upfront and saves hours of frustration later.
Start under the desk. Cable trays (wire baskets or J-channels) mount to the underside of the work surface and collect power strips, excess cable length, and adapters in one accessible location. Choose trays at least 4 inches deep and as wide as the space allows. Route cables from equipment down to the tray using adhesive clips or Velcro straps every 12-18 inches.
Power strips belong in the tray, not on the floor. Mount them with screws or heavy-duty adhesive, outlets facing down to prevent dust accumulation. Use a surge protector with at least 1000 joules of protection and a grounded three-prong design. If you’re running high-draw equipment (laser printers, space heaters), check that the strip’s amp rating matches your needs, most handle 15 amps, but cheaper models may be limited to 10.
For vertical cable runs, like from desk to floor or desk to wall, use a cable sleeve or split loom tubing. These zip or wrap around bundled cables and keep them moving as a single unit. Measure the run first: sleeves come in fixed lengths and can’t be easily extended.
Cable clips and raceways handle surface routing along walls or baseboards. Adhesive clips work on painted drywall and wood trim, but won’t hold on textured surfaces, use screw-mount clips there. Raceways (plastic channels with snap-on covers) give a cleaner look for permanent installations and can be painted to match the wall.
Label both ends of every cable with masking tape and a marker. When you need to unplug something in six months, you won’t be playing the guessing game. Use different colors for power vs. data cables if you want to get fancy, but plain labels are enough.
If you’re comfortable with basic construction and want a more integrated approach, consider building a custom desk with built-in cable channels or grommets. Fix This Build That has detailed plans for desks with routed cable management features and hidden storage compartments.
Lighting and Ambiance for Focus and Comfort
Lighting affects everything from eye strain to circadian rhythm. Get it wrong, and you’ll fight headaches and fatigue all day. Get it right, and your workspace just works.
Task lighting is non-negotiable. A desk lamp with an adjustable arm and head lets you direct light exactly where you need it, on paperwork, a keyboard, or a project area, without washing out your monitor. Look for LED lamps with at least 500 lumens and a color temperature between 4000-5000K (neutral white). Warmer tones (2700-3000K) feel cozy but reduce contrast: cooler tones (5500K+) mimic daylight but can feel harsh in evening hours.
Position the lamp to the side opposite your dominant hand to avoid shadows while writing or working. If you’re right-handed, lamp goes on the left. For screen-only work, place it behind the monitor angled toward the wall, this creates indirect bounce light that fills the space without glare.
Overhead lighting should be diffuse, not a single bright point source. A ceiling fixture with a frosted shade or multiple recessed cans distributes light evenly and reduces shadows on the work surface. Avoid placing overhead lights directly above your monitor: the reflection on the screen will force you to tilt it awkwardly or dim the display too much.
If you’re stuck with harsh overhead fluorescents (common in basements or converted garages), add a lamp with a shade to soften the contrast. Or swap the fluorescent tubes for LED equivalents with a better CRI (Color Rendering Index), aim for 85+ to reduce the sickly green cast of cheap tubes.
Window placement complicates things. Natural light is great for mood and energy, but direct sunlight on your screen or in your eyes ruins usability. Position your desk perpendicular to windows when possible, not facing them or with your back to them. Use adjustable blinds or sheer curtains to control intensity throughout the day.
Conclusion
A well-executed desk setup doesn’t happen by accident. It’s the result of intentional choices about desk dimensions, equipment placement, cable routing, and lighting, all working together to support long, focused work sessions without physical strain. Measure your space, choose components that fit your workflow, and take the time to get ergonomics right the first time. The difference between a workspace that fights you and one that supports you comes down to these fundamentals.