Table of Contents
ToggleA panel ready counter depth refrigerator bridges the gap between high-end custom cabinetry and modern appliance function. Unlike standard refrigerators that stick out like a sore thumb, these units sit flush with surrounding counters and accept custom cabinet panels that match the kitchen’s existing woodwork. The result? A built-in look without the six-figure price tag of true integrated appliances. For homeowners planning a kitchen remodel or replacing aging appliances, understanding the mechanics, dimensions, and installation requirements of panel ready counter depth models can mean the difference between a cohesive design and a retrofit headache.
Key Takeaways
- A panel ready counter depth refrigerator delivers a seamless, built-in kitchen appearance at a fraction of the cost of fully integrated appliances, typically ranging from $2,500–$6,000 versus $8,000–$15,000+.
- Counter depth refrigerators sit flush with cabinets at 24–27 inches deep, restoring 6–8 inches of valuable aisle space compared to standard models that protrude 30–36 inches into the room.
- Successful panel ready installation requires accurate measurements, careful hinge selection (overlay vs. inset), and coordination with cabinet installation to ensure proper panel sizing and weight distribution.
- Verify electrical circuits, water line routing, and ventilation clearances before delivery, as panel ready counter depth models require technical setup including 115V dedicated circuits and 1-inch airflow gaps on top and sides.
- Custom panel fabrication typically takes 2–4 weeks and costs $500–$1,500 depending on complexity, with the flexibility to update the refrigerator’s appearance during future kitchen refreshes without replacing the entire appliance.
What Is a Panel Ready Counter Depth Refrigerator?
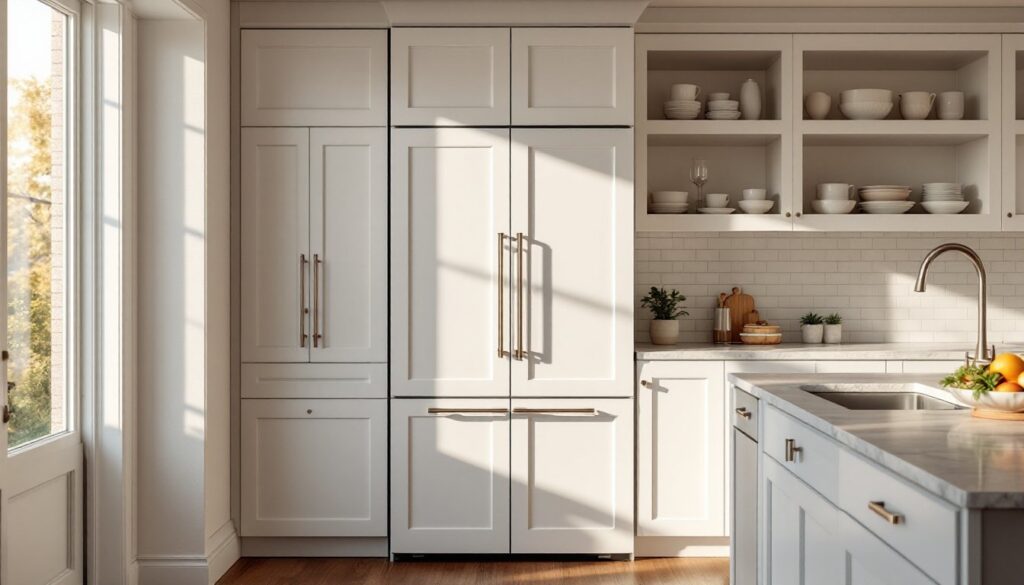
A panel ready counter depth refrigerator is a freestanding appliance designed to accept custom front and side panels that match the homeowner’s cabinetry. The refrigerator itself comes without finished exterior surfaces, just a bare metal or plastic shell with mounting hardware for attaching wood, laminate, or other cabinet-matching panels.
Counter depth refers to the unit’s overall depth, typically 24–27 inches (not including door handles), which aligns with standard kitchen base cabinets that measure 24 inches deep. This is shallower than traditional refrigerators, which often protrude 30–36 inches into the room. The trade-off is reduced interior capacity, usually 15–22 cubic feet versus 22–30+ cubic feet in standard models.
Panel ready means the appliance lacks a finished front face. Instead, it includes mounting brackets, adhesive strips, or screw bosses designed to secure custom panels. Door panels are typically 3/4-inch thick cabinet-grade plywood or MDF finished to match surrounding cabinetry. Some manufacturers supply templating kits to ensure accurate panel sizing, since door dimensions vary by brand and hinge configuration.
These refrigerators require ventilation clearances, usually 1 inch on top and sides, to prevent compressor overheating. Built-in models often use front or plinth venting, but panel ready units are technically freestanding, so airflow around the back and sides is essential. Always check the manufacturer’s installation manual for exact clearance specs.
Why Choose Panel Ready Over Standard Refrigerators?
Aesthetic Benefits and Design Flexibility
Panel ready units deliver a seamless, built-in appearance without the cost of true integrated appliances, which can run $8,000–$15,000+ depending on brand and features. A quality panel ready model typically costs $2,500–$6,000, with custom panels adding $500–$1,500 for materials and fabrication, depending on cabinet complexity and finish.
Homeowners gain complete control over the refrigerator’s exterior finish. Whether the kitchen features shaker-style cabinets in white oak, flat-panel walnut, or painted MDF, the refrigerator can match exactly. This flexibility extends to hardware, cabinet pulls and hinges are chosen by the homeowner, not dictated by the appliance manufacturer.
Another advantage is future-proofing. If the kitchen undergoes a cosmetic refresh down the line, say, a shift from espresso stain to natural maple, only the door panels need replacement, not the entire appliance. This modularity keeps the look current without discarding a functional refrigerator.
Many kitchen design trends emphasize concealed appliances to create a furniture-like aesthetic. Panel ready models support this approach, allowing the refrigerator to recede visually and letting architectural details or statement backsplashes take center stage.
Space-Saving Advantages of Counter Depth Design
Counter depth refrigerators don’t just look better, they improve kitchen workflow by eliminating the protruding appliance that disrupts the galley or work triangle. In kitchens with narrow aisles (common in homes built before 1980), a standard-depth refrigerator can reduce clearance to 30 inches or less, making it difficult to open drawers or navigate with hot pans.
A counter depth unit restores that space, typically adding 6–8 inches of aisle width. In tight layouts, that’s the difference between comfortable movement and constant collision. But, the shallower depth means less usable volume. A family accustomed to a 25-cubic-foot standard refrigerator will need to adjust to 18–20 cubic feet in most counter depth models. Meal planning, bulk shopping habits, and freezer use all factor into whether the trade-off makes sense.
Door swing clearance also improves. Standard fridges often require 36+ inches of clearance to fully open doors and pull out crisper drawers. Counter depth models need less, making them viable in kitchens where an island or peninsula limits door swing radius.
Key Features to Look for When Shopping
Start with hinge configuration. Panel ready refrigerators use either overlay hinges (door panels sit in front of the cabinet box) or inset hinges (panels sit flush with the cabinet frame). Overlay is more forgiving during installation and accommodates slight misalignment. Inset hinges require precise panel sizing and can be tricky for DIYers without cabinet experience.
Panel weight capacity matters. Most units support 30–50 pounds per door panel, but thicker hardwoods or decorative glass inserts can exceed that limit. Verify maximum weight specs before fabricating panels, especially for French door models where each panel is smaller and less structurally supported.
Look for adjustable door hinges. These allow for minor tweaks after panel installation to correct alignment issues or account for cabinet settling. Cheaper models may use fixed hinges, which can result in uneven gaps or doors that don’t close flush.
Refrigerator capacity vs. freezer capacity varies widely. Some models allocate 70% refrigerator / 30% freezer, while others flip that ratio. Families who freeze bulk meat purchases or meal-prep in batches need a larger freezer compartment. Check the actual cubic footage breakdown, not just total capacity.
Energy efficiency is critical for a unit running 24/7. Look for ENERGY STAR certification, which typically means 15–20% better efficiency than federal minimums. Annual operating costs for an efficient counter depth model run $50–$80 in most regions, versus $80–$120 for older or less efficient units.
Some built-in refrigerator options include panel ready designs with advanced features like dual compressors (separate cooling systems for fridge and freezer to reduce odor transfer and improve humidity control) or air purification systems. These add $500–$1,500 to the price but can extend produce life and reduce food waste.
Water line and ice maker placement affects installation. Rear water connections are standard, but some models offer side or bottom connections that simplify hookup in tight spaces. If the kitchen lacks an existing water line, budget $200–$500 for a plumber to run a 1/4-inch copper or braided stainless supply line from the nearest cold water source.
Installation Considerations and Custom Panel Requirements
Panel ready refrigerators are not plug-and-play. Installation involves electrical, plumbing (if equipped with ice/water), and carpentry work. While a confident DIYer can handle panel attachment, the appliance itself should be installed by a licensed technician if it requires water line hookup or involves moving gas lines for adjacent ranges.
Electrical requirements are typically 115V, 15-amp dedicated circuit. Most homes built after 1990 have this in place, but older kitchens may share circuits between multiple appliances, risking breaker trips under load. Verify circuit capacity before delivery day. Running a new circuit costs $150–$400 depending on distance from the panel and local labor rates.
Custom panel fabrication can be DIY or contracted out. If ordering panels from the cabinet maker who built the kitchen, expect 2–4 weeks lead time and provide exact dimensions from the refrigerator’s installation manual. Most manufacturers supply cardboard or foam templates to trace panel outlines. Panels are usually 3/4-inch plywood with applied finish, though some high-end kitchens use solid hardwood stiles and rails with veneered center panels to match true frame-and-panel cabinet doors.
Attachment methods vary. Some models use double-sided VHB tape (very high bond) alone, others combine tape with mechanical fasteners like screws driven from the interior. Tape-only systems are cleaner (no visible hardware) but less forgiving, once stuck, panels are difficult to remove without damage. Screw-mount systems allow for removal and adjustment but require precise drilling.
Weight distribution is critical for French door models. Each door panel must be balanced and square, or doors will sag over time, causing uneven gaps or seal failure. Use a 4-foot level to check alignment after hanging panels. If a door sits out of plumb, adjust hinge screws (if available) or add shim washers between the panel and door.
Toe kick height should match surrounding cabinets, typically 4–4.5 inches. Most panel ready units include adjustable leveling legs at the front corners. Use these to set the appliance height so top surfaces align with adjacent counters. A refrigerator that sits too high or low breaks the visual line and looks amateurish.
Homeowners tackling renovation projects should coordinate refrigerator delivery with cabinet installation. If the fridge arrives before cabinets are in place, there’s no reference point for panel sizing. Conversely, if cabinets are installed first, ensure the refrigerator’s footprint fits the opening with required clearances. Mistakes here can mean re-ordering panels or even returning the appliance.
Permits and inspections are rarely required for refrigerator replacement unless significant electrical or plumbing work is involved. But, if the project includes moving walls, relocating circuits, or rerouting water lines, check with the local building department. Most jurisdictions require permits for electrical work beyond simple receptacle replacement.
Conclusion
A panel ready counter depth refrigerator isn’t the simplest appliance swap, but for homeowners committed to a high-end, cohesive kitchen design, it delivers built-in aesthetics at a fraction of the cost. Success hinges on accurate measurements, understanding hinge and panel requirements, and coordinating delivery with cabinet installation. With the right prep work, the result is a kitchen where the refrigerator disappears into the cabinetry, exactly as intended.