Table of Contents
ToggleIf you’ve been scrolling through kitchen remodels and noticed a trend toward larger, more communal islands with seating, storage, and multi-function zones, you’ve likely stumbled onto the ohana island kitchen concept. Rooted in the Hawaiian word for “family,” an ohana kitchen puts connection at the center, literally. It’s a layout that transforms the island from a prep surface into a true gathering hub where cooking, assignments, conversation, and snacking all happen side by side. Whether you’re planning a full remodel or just rethinking your current setup, understanding the design principles behind an ohana island can help you create a kitchen that works harder for the people who use it every day.
Key Takeaways
- An ohana island kitchen transforms a functional workspace into a multi-use family gathering hub by integrating seating, storage, and prep zones in one large, centrally located island.
- A properly sized ohana island should measure at least 4 feet wide by 7 feet long with dual-height countertops (36 inches for prep, 42 inches for dining) to accommodate multiple cooks and seating for four to six people.
- Key design features include integrated appliances, electrical outlets and USB ports, durable family-friendly materials like quartz, and strategic storage accessible from all sides to maximize functionality.
- Ohana island kitchens improve workflow for multi-cook households, increase sightlines for parental supervision, eliminate the need for a formal dining table, and consistently deliver strong ROI on kitchen remodels.
- Critical planning steps include hiring a structural engineer for load-bearing walls, obtaining permits for electrical and plumbing work, selecting appropriate ventilation for cooktops, and ensuring adequate subfloor support for the island’s weight.
- Homeowners can DIY assembly, finishing, and painting work but should hire licensed professionals for plumbing, gas lines, electrical circuits, and any structural modifications to ensure code compliance and safety.
What Is an Ohana Island Kitchen?
An ohana island kitchen isn’t a specific brand or product line, it’s a design philosophy that emphasizes openness, multi-generational use, and flexibility. The term “ohana” translates to family in Hawaiian, and in home design it refers to layouts that prioritize togetherness without sacrificing function.
In practical terms, an ohana island kitchen features a large central island (typically 4 feet by 8 feet or larger) that serves multiple roles: food prep, dining, assignments station, and social anchor. Unlike traditional islands that function mainly as extra counter space, an ohana island integrates seating for at least three to four people, often with dedicated zones for different activities.
This style became popular in open-concept floor plans where the kitchen flows into the living or dining area. It’s especially common in multigenerational homes or households where the kitchen doubles as command center, and it’s designed to keep everyone in the same space without crowding the work triangle.
Key Design Features of an Ohana Island Kitchen
A true ohana island isn’t just oversized, it’s thoughtfully zoned. Here are the features that set it apart:
- Dual-height countertops: A raised bar (42 inches) on one side for seating, with a standard work surface (36 inches) on the other. This creates visual separation and hides prep mess from diners.
- Integrated appliances: Dishwasher drawers, wine fridges, or a second sink/prep sink built into the island to reduce back-and-forth trips.
- Storage on all sides: Deep drawers, pull-out trash bins, open shelving, or cubbies accessible from multiple angles.
- Electrical outlets and USB ports: Usually installed on the ends or in pop-up units within the countertop to support laptops, charging stations, and small appliances.
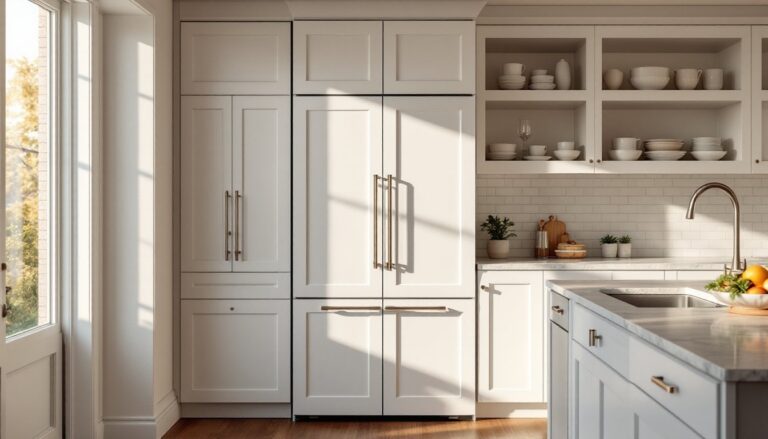
- Durable, family-friendly materials: Quartz or solid surface countertops that resist staining and heat: hardwoods or engineered wood for cabinetry that can handle daily wear.
Many designs include a waterfall edge on at least one end, which protects cabinetry and adds a finished look when the island is viewed from the living area.
Choosing the Right Island Size and Layout
Size matters, but so does proportion. An island that’s too large for the room creates bottlenecks: too small, and it loses its ohana function.
Minimum clearances (per IRC and NKBA guidelines):
- 42 inches of clearance on all sides for single-cook households
- 48 inches if multiple people will be working simultaneously or if you have full-size appliances (range, fridge) on surrounding walls
For a true ohana layout, plan on an island footprint of at least 4 feet wide by 7 feet long. This gives you roughly 28 square feet of surface area, enough for a cooktop or sink, prep zone, and seating for four.
Layout options:
- L-shaped island: Adds a peninsula return, creating two distinct zones (cooking and eating).
- T-shaped island: Extends a bar or table perpendicular to the main island, maximizing seating without blocking pathways.
- Rectangular with overhang: Simplest build: one or two sides have a 12- to 15-inch overhang for stools.
If your kitchen is under 150 square feet, a full ohana island may overwhelm the space. Consider a mobile island or a peninsula attached to one wall instead. You’ll sacrifice some of the 360-degree access but keep the communal seating and storage benefits.
Benefits of an Ohana-Style Kitchen Island for Modern Families
Why go bigger and more complex? Because the payoff is daily, not just aesthetic.
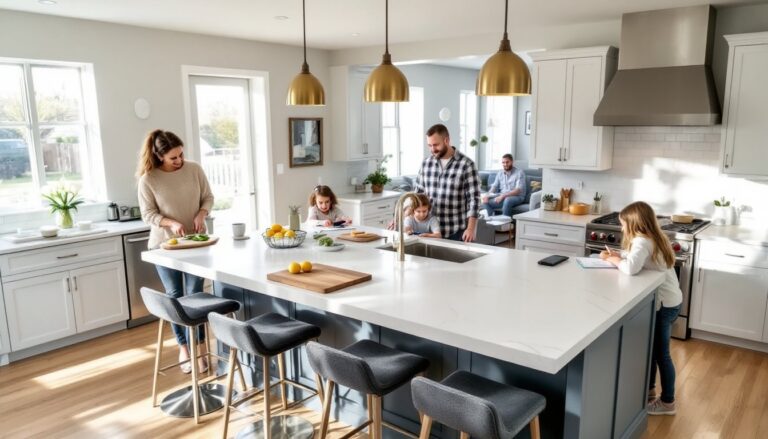
Increased seating without a formal dining table. Many households rarely use a separate dining room. An ohana island with four to six stools becomes the default spot for breakfast, after-school snacks, and casual dinners. This frees up square footage elsewhere or allows for a smaller dining table.
Better workflow for multiple cooks. With a second sink, additional prep surface, and strategically placed storage, two or three people can work in the kitchen without tripping over each other. One person preps at the island while another works at the main counter and range.
Improved sightlines and supervision. Parents can chop vegetables or unload groceries while keeping an eye on kids doing assignments, watching TV, or playing in the adjacent living area. The island removes the wall (literal or figurative) between the cook and the rest of the household.
Higher resale value. According to remodeling ROI data, kitchen upgrades, especially those that add functional square footage or seating, consistently rank among the top returns on investment. An ohana island signals a modern, family-ready home.
Flexible entertaining space. For gatherings, the island becomes a buffet, bar, or dessert station. Guests naturally congregate around it, and the host remains part of the conversation instead of isolated at the stove.
Planning Your Ohana Island Kitchen: Essential Considerations
Before you demo cabinets or call a contractor, map out these factors.
Structural and code requirements:
- Load-bearing walls: If your remodel involves removing or moving walls to open up the kitchen, hire a structural engineer. Load-bearing walls require beams and posts: this isn’t a DIY decision.
- Electrical and plumbing permits: Adding outlets, moving a sink, or installing a cooktop in the island all require permits in most jurisdictions. Budget time and cost for inspections.
- Ventilation: If you’re adding a cooktop to the island, you’ll need a downdraft vent or an overhead island hood. Downdrafts are less effective for high-BTU gas ranges: plan accordingly.
Material selection:
- Countertops: Quartz is the go-to for busy families (non-porous, low maintenance). Granite works but requires annual sealing. Butcher block adds warmth but needs oiling and isn’t ideal near sinks.
- Cabinetry: Face-frame construction (standard in North America) offers more rigidity for large islands. Plywood boxes are stronger than particleboard, especially if you’re adding heavy appliances or stone tops.
- Flooring underneath: If you’re installing an island where there wasn’t one, check that the subfloor is level and robust enough. A 10-foot island with stone counters can weigh 800+ pounds.
Lighting design:
Plan for at least two to three pendant lights spaced 24 to 30 inches apart over the seating area. Use dimmable LEDs (3000K color temp for warm ambiance). If the island includes a cooktop or main prep zone, add dedicated task lighting, either recessed cans or under-cabinet strips on the perimeter.
Seating ergonomics:
- Counter height (36 inches): use 24-inch stools
- Bar height (42 inches): use 30-inch stools
- Allow 24 inches of width per person at the bar for elbow room
Storage strategy:
An ohana island should pull double duty. Dedicate at least one section to deep drawers for pots and mixing bowls, another to pull-out shelves for dry goods, and a third to waste and recycling. If you have young kids, consider child-proof locks on drawers holding sharp tools or cleaning supplies.
DIY vs. Professional Installation: What Homeowners Should Know
An ohana island sits at the border between ambitious DIY and hire-it-out territory. Here’s the honest breakdown.
What a confident DIYer can handle:
- Assembling and installing stock or semi-custom cabinets if the floor is level and no plumbing/electrical work is involved. Use a laser level, shim carefully, and fasten cabinets to each other and (if possible) to the floor.
- Installing a pre-fabricated countertop (butcher block, laminate, or pre-cut quartz) if it’s a standard size. You’ll need a circular saw, drill, and construction adhesive. Two people minimum for lifting.
- Painting or staining cabinetry and adding hardware.
When to call a pro:
- Custom cabinetry or complex joinery. If your island includes curves, angled corners, or built-in appliances with tight tolerances, hire a finish carpenter.
- Plumbing or gas lines. Running a water supply and drain to an island sink, or a gas line to a cooktop, requires a licensed plumber. Mistakes can lead to leaks, mold, or worse. Many jurisdictions won’t issue a certificate of occupancy without permitted plumbing work.
- Electrical work beyond replacing an outlet. Adding new circuits (islands often need at least one 20-amp circuit) or installing a downdraft vent motor requires a licensed electrician and inspection.
- Structural modifications. Any work involving beams, headers, or load-bearing elements needs engineering drawings and a general contractor or structural specialist.
Hybrid approach:
Many homeowners save money by handling demo, painting, and finish work themselves, then bringing in trades for the technical rough-in (plumbing, electrical, HVAC for ventilation). This cuts labor costs by 30 to 40 percent while keeping the project code-compliant.
Permit and inspection reality:
Even if you’re doing the work yourself, pull permits for electrical, plumbing, and structural changes. Inspectors catch unsafe work before it becomes dangerous, and unpermitted work can tank a home sale or void insurance claims. Budget two to four weeks for permit approval in most metro areas.
For design inspiration and detailed kitchen layout examples, browsing portfolio sites can help you visualize how different island configurations work in real spaces. Many kitchen remodeling guides also provide material lists and step-by-step walkthroughs for specific elements like sink installation or lighting placement.
Conclusion
An ohana island kitchen isn’t just a trend, it’s a practical response to how families actually use their homes. By investing in a well-planned island that balances work zones, seating, and storage, homeowners create a space that adapts to daily chaos and weekend hosting alike. Whether you’re tackling the project yourself or working with a contractor, the key is getting the size, clearances, and rough-ins right from the start. Done well, an ohana island becomes the spot everyone gravitates toward, and that’s the whole point.