Table of Contents
ToggleSmall bathrooms demand smart choices, and a narrow depth bathroom vanity can transform a cramped space into a functional, comfortable room. Standard vanities measure 21 inches deep, but shallow models ranging from 12 to 18 inches open up square footage without sacrificing storage or style. Whether renovating a powder room, updating a guest bath, or retrofitting an older home with tight clearances, these space-efficient fixtures deliver modern convenience in a compact footprint. This guide walks through what defines a narrow vanity, why it might be the right move, and how to choose and install one yourself.
Key Takeaways
- A narrow depth bathroom vanity measures 12 to 18 inches deep—compared to the standard 21 inches—and reclaims 3 to 9 inches of floor space without sacrificing storage or functionality.
- Shallow vanities improve bathroom accessibility and compliance with building codes by providing the required 21 inches of clear floor space in front of fixtures, which is especially beneficial for aging-in-place renovations and mobility-assisted users.
- The 16 to 18-inch depth range offers the best balance for small bathrooms, delivering a usable 6-inch-deep bowl and room for plumbing and storage while fitting through doorways where standard vanities won’t.
- Wall-mounted narrow vanities simplify cleaning and create a visual sense of spaciousness by keeping the floor visible, while vessel sinks paired with shallow cabinets are ideal for maximizing the benefits of compact designs.
- Proper installation of a narrow depth bathroom vanity requires anchoring wall-mounted units into studs with a ledger board, leveling freestanding models, and caulking gaps with silicone to prevent moisture damage in tight spaces.
- Finish materials like quartz, solid surface, and thermofoil are more durable than natural stone in narrow bathroom environments, and vessel or integrated sink styles work better with shallow cabinetry than undermount options.
What Is a Narrow Depth Bathroom Vanity?
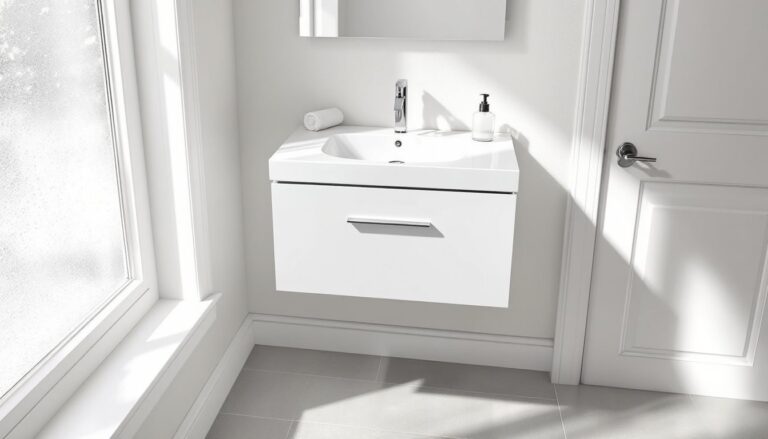
A narrow depth bathroom vanity (also called a shallow or slim vanity) measures 12 to 18 inches from front to back, compared to the standard 21-inch depth. Some ultra-slim models sit at 10 inches, though these typically sacrifice bowl depth and under-sink storage.
These vanities come in three configurations: wall-mounted units that leave floor space visible, freestanding cabinets with legs or a toe kick, and corner models that maximize awkward layouts. Cabinet construction mirrors full-depth vanities, plywood or MDF boxes with face frames, soft-close hinges, and drawer glides, but the reduced projection means interior storage width often compensates for lost depth.
Most manufacturers offer 18-inch to 48-inch widths in narrow profiles, with single-bowl designs dominating the narrower end and double-bowl options appearing at 36 inches and wider. Countertop materials include integrated ceramic tops (common on budget models), solid-surface slabs, and stone or quartz cut to match the shallow footprint. Vessel sinks pair well with narrow vanities since they sit above the counter, reducing the need for deep cabinetry below.
Why Choose a Shallow Vanity for Your Bathroom
Space-Saving Benefits
A shallow vanity reclaims 3 to 9 inches of floor space compared to standard depth. In a powder room or half-bath, that difference determines whether the door swings freely or bangs into the vanity edge. It also matters in older homes with narrow bathrooms where a standard vanity forces users to stand sideways at the sink.
That recovered space improves clearance codes too. The International Residential Code (IRC) recommends 21 inches of clear space in front of fixtures: a slim vanity can bring a non-compliant layout into spec without moving walls. For wheelchair users or anyone with mobility aids, the extra room allows easier approach angles and turning radius.
Storage isn’t eliminated, it’s reorganized. Instead of deep cabinets that bury items in back, narrow vanities use drawer dividers, pull-out trays, and door-mounted organizers to keep toiletries visible and accessible. Vertical stacking replaces horizontal sprawl, which often suits small households better than cavernous cabinets.
Improved Bathroom Flow and Accessibility
A shallower profile changes how people move through the room. In a shared family bathroom, two people can pass without turning sideways. In a narrow en suite, one person can stand at the vanity while another accesses the shower or toilet without collision.
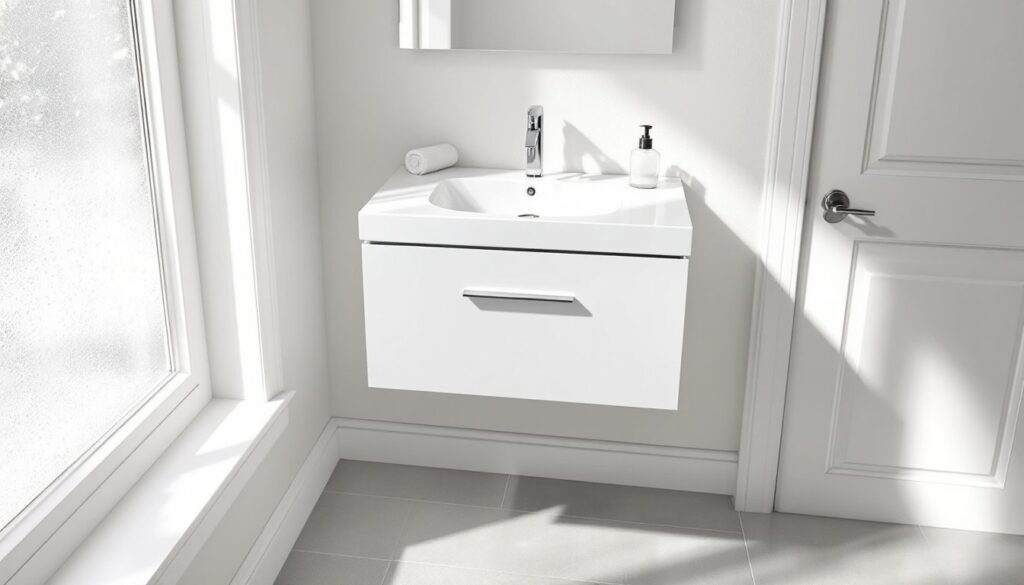
Wall-mounted narrow vanities also simplify cleaning. With no base cabinet touching the floor, sweeping and mopping take seconds, and moisture can’t rot a toe kick or collect around cabinet feet. Floating designs also create a visual trick: exposed floor makes the room feel larger, even though functional space is only marginally increased.
For aging-in-place renovations, bathroom design trends now favor open floor plans and adaptable fixtures. A 16-inch-deep vanity leaves room for future grab bars, reduces trip hazards, and accommodates walkers or wheelchairs better than bulkier installations.
Choosing the Right Depth and Dimensions
Start by measuring door swing clearance and distance to opposing walls or fixtures. Code typically requires 21 inches in front of the vanity: measure from the wall behind the vanity forward, then subtract the vanity depth you’re considering. If you’re left with 21 inches or more, you’re clear. For powder rooms with inward-swinging doors, stand inside and simulate the door arc, 18 inches of vanity depth often works where 21 won’t.
Standard narrow depths include:
- 12 to 14 inches: Extreme space-saver. Expect a shallow bowl (4 to 5 inches) and minimal under-sink storage. Works for half-baths or utility sinks.
- 16 to 18 inches: Sweet spot for most small baths. Provides a usable bowl (6 inches deep) and room for plumbing, a single drawer, and a cabinet shelf.
- 19 to 20 inches: Technically narrow, but only saves an inch or two over standard. Consider if you need a deeper countertop for grooming tools or decor.
Vanity width matters as much as depth. A 24-inch-wide unit fits tight spots but limits counter space: 30 to 36 inches balances storage and elbow room. Measure your plumbing rough-in (drain centerline to wall) to confirm the sink bowl will align. Most vanities tolerate a few inches of offset, but wall-mounted faucets require precise placement.
Bowl style affects usable depth. An undermount sink mounted below the countertop requires a deeper cabinet to house the bowl and trap. A vessel sink sits on top, so the cabinet can be shallower, ideal for 12- to 14-inch vanities. Integrated tops (sink and counter molded as one piece) streamline installation and suit mid-depth vanities (16 to 18 inches).
Finally, check faucet reach. A standard 4-inch centerset faucet on a narrow counter may project too far forward, creating splash outside the bowl. Look for shorter spouts or wall-mounted faucets to keep water where it belongs.
Top Styles and Design Options for Narrow Vanities
Modern and contemporary styles dominate shallow vanities. Floating wall-mounted units with slab doors, integrated handles, and matte finishes (white, gray, black) align with minimalist interior design trends and visually expand small spaces. Pair with a rectangular vessel sink and single-handle faucet for a clean look.
Traditional narrow vanities typically feature face-frame construction, raised-panel doors, and furniture feet. Wood species like oak, maple, or cherry work well, though paint-grade MDF keeps costs down. A marble or quartz top with an undermount oval bowl fits classic aesthetics. These work in older homes where modern floating cabinets would clash with existing trim and fixtures.
Farmhouse and transitional styles blend old and new: a wood vanity with open lower shelving (no doors), metal or ceramic knobs, and a stone or butcher-block top. The open shelf compensates for lost cabinet depth by displaying baskets or rolled towels. This style suits budget-conscious DIYers since building a simple frame and adding a prefab top is straightforward.
Industrial looks pair metal-frame wall-mounted vanities with concrete, reclaimed wood, or solid-surface tops. Exposed plumbing (particularly wall-mounted drains and supplies) reinforces the aesthetic and simplifies installation since no cabinet back is required.
Finish durability matters in wet environments. Thermofoil (vinyl-wrapped MDF) resists moisture but can peel if edges aren’t sealed. Solid wood needs multiple coats of water-resistant polyurethane or conversion varnish. Laminate and acrylic panels hold up well and come in dozens of colors and textures. For tops, quartz and solid surface outperform natural stone in tight baths because they’re non-porous and easier to cut to custom depths.
Installation Tips for DIY Enthusiasts
Gather tools and materials before starting: level (48-inch recommended), stud finder, drill/driver with bits, adjustable wrench, basin wrench (for tight faucet nuts), silicone caulk, plumber’s putty or gasket, supply lines (braided stainless, not plastic), and a P-trap kit if replacing the old one. Wear safety glasses when drilling tile or cutting.
Shut off water at the angle stops under the sink (turn clockwise). If stops are seized or leaking, replace them, it’s easier now than after the vanity is in. Disconnect supply lines and unscrew the P-trap, keeping a bucket handy for residual water.
Remove the old vanity by unscrewing it from the wall. Check for hidden fasteners inside cabinets or behind the backsplash. If caulk bonds the vanity to the wall or floor, score it with a utility knife to avoid tearing drywall or tile.
Locate studs behind the vanity area. Wall-mounted vanities must anchor into studs or blocking, drywall anchors alone won’t support the fixture’s weight plus a person leaning on it. If studs don’t align with the vanity’s mounting brackets, install a 2×6 or 2×8 ledger board horizontally across studs at the correct height, then fasten the vanity to the ledger.
For freestanding vanities, confirm the floor is level. If it slopes more than 1/4 inch over the vanity width, shim the low side with composite shims (wood swells in damp environments). A rocking vanity stresses joints and cracks countertops.
Install the faucet and drain on the countertop before setting the vanity, especially with narrow cabinets where interior access is tight. Follow the faucet manufacturer’s instructions: most require plumber’s putty or a rubber gasket under the base. Tighten the mounting nuts with a basin wrench, hand-tight plus a quarter turn. Over-tightening cracks ceramic.
Set the vanity in place. For wall-mounted units, hook the mounting rail onto the ledger or studs, double-check level in both directions, and drive 3-inch screws through the vanity’s hanging bracket into studs. For freestanding models, push against the wall, level, shim if needed, and screw through the back rail into studs.
Connect plumbing: attach braided supply lines to angle stops and faucet tailpieces (hand-tight, then a quarter turn with a wrench). Align the P-trap between the drain tailpiece and the wall stub-out: plastic traps hand-tighten, metal ones need slip-joint pliers. Turn water on slowly and check for leaks. Tighten connections if drips appear, but don’t overtorque, you’ll crack the fittings.
Caulk gaps between the vanity and wall with 100% silicone caulk (not acrylic latex, which mildews). Smooth the bead with a wet finger or caulk tool. If the vanity sits on the floor, caulk the base only at the back and sides, leaving the front open so any future leaks can escape and alert you to problems.
Permit considerations: replacing a vanity typically doesn’t require a permit if you’re not moving plumbing or electrical. If you’re relocating the drain or adding outlets, check local codes. Significant kitchen and bathroom remodel work often triggers permit and inspection requirements, especially if walls or structural elements are involved.
Give caulk 24 hours to cure before heavy use. Store cleaning supplies and toiletries only after confirming no leaks remain.