Table of Contents
ToggleWalk into any bathroom that feels “finished,” and you’ll notice one thing: the mirror doesn’t just hang there, it anchors the entire space. A well-chosen vanity mirror affects how the room feels, how much light bounces around, and whether that morning routine happens under harsh shadows or even illumination. It’s not about aesthetics alone: it’s about function married to form. Whether renovating an outdated powder room or outfitting a new build, understanding mirror options, sizing conventions, and mounting methods will save headaches and ensure the final result works as hard as it looks.
Key Takeaways
- A bathroom vanity mirror should be 4–8 inches narrower than your countertop, positioned 4–6 inches above the counter, with the centerline aligned to the vanity for optimal proportions and function.
- Framed mirrors suit traditional styles and forgive imperfect drywall, while frameless mirrors offer a clean, modern look but require flat walls and precise, level installation.
- Mirrors over 15 pounds require stud mounting or toggle bolts; heavy mirrors benefit from a French cleat mounting system for maximum stability and safety.
- Integrated LED lighting, anti-fog coatings, and magnifying zones solve common bathroom problems like shadows, condensation, and detailed grooming without requiring separate fixtures.
- Safety backing film, proper edge sealing, and moisture-resistant hardware prevent glass de-lamination and shatter risk in wet bathroom environments.
- Smart installation prep—using a stud finder, marking level lines, and recruiting a helper—ensures a professional DIY result and prevents costly mistakes.
Why Your Bathroom Vanity Mirror Matters More Than You Think
A vanity mirror serves three distinct roles: task lighting reflector, spatial amplifier, and design focal point. Poor mirror placement creates dead zones where shadows fall across the face during grooming. A mirror that’s too small makes a double-sink vanity feel chopped up: one that’s oversized on a pedestal sink looks cartoonish.
From a building science perspective, mirrors influence perceived room size and natural light distribution. A 24-inch-wide mirror over a 30-inch vanity leaves dark gaps on either side. Codes don’t govern mirror size, but the International Residential Code (IRC) does set minimum ceiling heights and egress window requirements that affect where and how much wall space remains for mirrors.
Safety matters, too. Bathrooms are wet environments. Mirrors mounted with inadequate backing or wrong adhesive can de-laminate or, in worst cases, shatter. Using moisture-resistant MDF or solid wood frames, proper wall anchors into studs, and corrosion-resistant hardware prevents callbacks and accidents. If the mirror weighs more than 20 pounds, toggle bolts or direct stud mounting isn’t optional, it’s necessary.
Types of Bathroom Vanity Mirrors to Consider
Vanity mirrors break into several categories, each with trade-offs in cost, install complexity, and style flexibility.
Framed mirrors come with wood, metal, or composite borders that can tie into existing trim, cabinetry, or fixtures. They’re forgiving if drywall isn’t perfectly flat, frames hide minor imperfections. Frames add 2–4 inches to overall dimensions, so a 30-inch mirror measures closer to 34–38 inches with frame.
Frameless (or beveled-edge) mirrors offer a clean, modern look and maximize reflective surface. They require flat, well-finished drywall because every ripple telegraphs through. Mounting typically uses J-channel at the bottom and mirror clips or adhesive at the top. Beveled edges (usually 1-inch width) catch light and add subtle detail without a full frame.
Medicine cabinets with integrated mirrors combine storage and reflection. Recessed models require cutting into the stud bay, doable in most partition walls, but not load-bearing walls without engineering. Surface-mount cabinets add 4–6 inches of depth, which can crowd narrow bathrooms.
Lighted mirrors (LED-backlit or front-lit) are gaining traction for eliminating shadow zones. Many use low-voltage DC power via an in-wall transformer. This means wiring during rough-in or surface conduit if retrofitting. Some models meet UL 8750 standards for LED lighting in damp locations, which is critical for code compliance.
For inspiration on integrating mirrors into broader bathroom remodel plans, design sourcebooks and case studies help visualize scale and proportion before committing to dimensions.
Framed vs. Frameless Mirrors
Framed mirrors suit traditional, transitional, and farmhouse styles. A 1×4 pine or poplar frame can be built for under $40 in materials, stained or painted to match vanity cabinetry. Factory-framed options range from $80 to $400 depending on size and finish quality.
Frameless mirrors lean contemporary. They’re often cheaper per square foot, $3–$6 per square foot for ¼-inch glass with polished edges, but installation is less forgiving. Frameless designs show every drywall ding and require perfectly level placement because there’s no trim to fudge alignment.
One often-overlooked factor: frame depth. A 2-inch-deep frame projects farther from the wall, which can interfere with medicine cabinet doors, sconce placement, or even the arc of a bathroom door if space is tight. Measure clearances before ordering.
Choosing the Right Size and Placement
Vanity mirror sizing isn’t arbitrary, there are proportional rules that prevent awkward gaps or overwhelming scale.
Width: The mirror should be 4–8 inches narrower than the vanity countertop. A 60-inch double vanity works well with a single 48–52-inch mirror or two 24-inch mirrors with a 6-inch gap between. If the vanity has a backsplash, subtract that from usable width.
Height: Standard mirror height runs 30–40 inches, but this depends on ceiling height and user needs. In an 8-foot ceiling bathroom, a 36-inch-tall mirror leaves room for sconces and avoids a cramped feeling. Taller users may want 42–48 inches to see the top of their head without stooping.
Mounting height: Bottom edge should sit 4–6 inches above the countertop or backsplash. This keeps the mirror clear of faucet spray and toiletries. Top edge typically lands around 72–76 inches above finished floor, comfortable sightlines for most adults. If installing for accessibility (ADA compliance in commercial or multifamily settings), the bottom edge of the reflective surface must be no higher than 40 inches above the floor.
Centering: Align the mirror’s centerline with the vanity’s centerline, not the room’s. If the vanity is off-center, the mirror follows the vanity. For double vanities with two sinks, center each mirror over its respective sink, not over the entire counter span.
Browsing interior design galleries with dimensioned bath layouts can clarify how different mirror configurations change the visual weight of a space, especially in narrow or L-shaped bathrooms.
Essential Features and Smart Upgrades
Basic mirrors reflect light. Upgraded mirrors solve problems.
Anti-fog coating or defoggers: Chemical coatings reduce condensation for about 18–24 months before reapplication is needed. Electric defogger pads (thin heating elements adhered to the back) use 20–40 watts and tie into the light switch or a timer. For DIY installs, low-voltage defogger kits are simpler than line-voltage, requiring only a plug-in transformer.
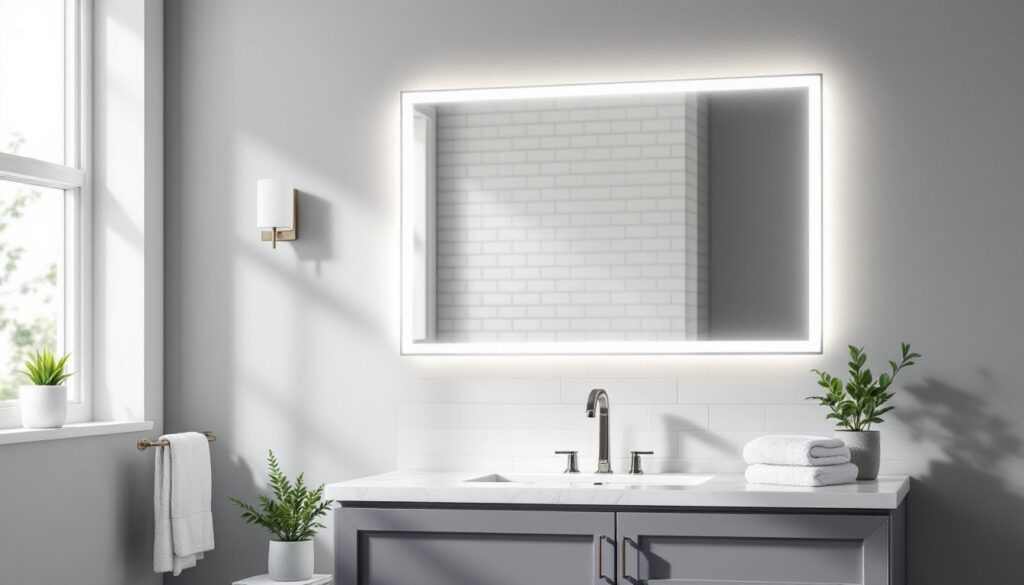
Integrated lighting: LED strips around the perimeter (backlit) or across the top/bottom (front-lit) provide task lighting where it’s needed most, on the face, not the wall. Look for 3000–4000K color temperature for accurate skin tones and makeup application. Dimmable models add flexibility. Most lighted mirrors draw 15–30 watts total, far less than twin sconces.
Magnification zones: Some mirrors embed a 3x or 5x magnifying section in one corner, useful for detail grooming without a separate handheld mirror. These are typically 6–8 inches in diameter.
Smart features: Bluetooth speakers, touch controls, and even defogging timers are available on high-end models ($300–$800). These require GFCI-protected electrical outlets within 3 feet, per NEC Article 406.9(C), often necessitating an electrician if no outlet exists near the vanity.
Tilt and extension mounts: Adjustable mounts let users angle the mirror or pull it away from the wall. Helpful in shared bathrooms with height differences, but they add mechanical complexity and more potential leak points in damp environments.
When comparing upgrade options, platforms like Houzz aggregate reviews and product specs, helping narrow choices based on real-world install experiences and longevity.
Installation Tips for DIY Success
Installing a vanity mirror is straightforward if prep work is solid. Rush it, and you’ll deal with crooked reflections or, worse, a shattered mirror.
1. Locate studs. Use a stud finder along the wall behind the vanity. Mark stud centers with painter’s tape. Heavy mirrors (>15 lbs) need at least one fastener into solid wood. For hollow-wall areas, use #8 toggle bolts rated for 50+ lbs or molly bolts.
2. Mark and level. Measure up from the countertop to set bottom-edge height (typically 5 inches). Use a 48-inch or longer level to mark a horizontal line. For large mirrors, a laser level avoids cumulative error over 60+ inches.
3. Choose mounting method.
• D-rings and screws: Common on framed mirrors. Use two D-rings on the back, spaced 16–24 inches apart. Drive screws into studs or use toggles. Leave about ⅛ inch of screw shaft exposed so D-rings can hook on.
• French cleat: A 1×4 ripped at 45 degrees, with one half on the wall and one on the mirror back. Strong, adjustable, and foolproof for heavy mirrors.
• Mirror adhesive (e.g., Loctite PL 530 or Liquid Nails for mirrors): Works for frameless mirrors up to 25 lbs. Apply vertical beads every 6 inches. Press and hold for 60 seconds. Adhesive cures in 24–48 hours, use painter’s tape as temporary support.
4. Handle with care. Wear gloves to avoid fingerprints and cuts. Mirrors chip easily at corners: use cardboard edge protectors during transport. If cutting mirror to size, score with a glass cutter and snap along a straight edge, or have a glass shop do custom cuts for $20–$40.
5. Add safety backing. Apply mirror safety film to the back of frameless mirrors. If the glass breaks, film holds shards together, reducing injury risk, especially important in households with kids.
6. Seal edges (frameless only). Run a thin bead of clear silicone along the bottom edge where mirror meets wall or backsplash. This stops moisture from wicking behind the glass and de-silvering the backing over time.
If installing a lighted mirror, ensure the electrical box is GFCI-protected and consult local code on whether a permit is required for adding a new circuit. Many jurisdictions allow homeowner-installed lighting on existing circuits, but verify first.
Tool list: Stud finder, 48-inch level or laser level, drill/driver, appropriate drill bits (masonry bit if hitting tile), tape measure, pencil, gloves, safety glasses, and if using adhesive, a caulk gun.
Safety note: Mirrors are heavy and awkward. A 36×48-inch mirror weighs 25–30 lbs. Get a second person to hold it in place while marking or during adhesive setup. Dropping a mirror isn’t just bad luck, it’s dangerous and wastes money.
Conclusion
Selecting and installing a bathroom vanity mirror combines carpentry, spatial planning, and a bit of electrical know-how if adding lights. The right mirror balances proportion, function, and style, eliminating shadows, amplifying light, and tying the room together. Measure twice, mount once, and don’t skip the stud finder. With solid prep and the right hardware, a DIY mirror install delivers pro-level results and immediate, visible impact every time someone walks into the bathroom.