Table of Contents
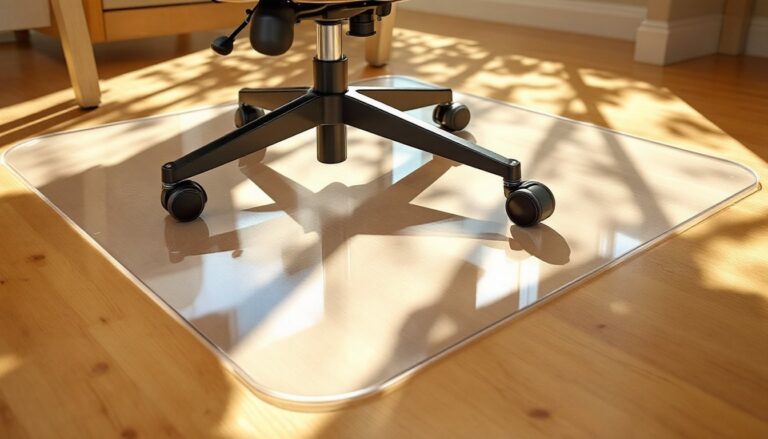
ToggleA miter saw sitting on a flimsy stand wobbles through every cut, throws off measurements, and eats up shop space. DIYers who work through trim projects, deck builds, or custom furniture know the frustration: no support wings, no storage, and constant recalibration. A dedicated miter saw station solves all of it. It provides stable, extended work surfaces for long stock, keeps blades and fasteners within arm’s reach, and turns a single tool into a full production hub. Building one isn’t complicated, but the payoff, in accuracy, speed, and safety, makes it one of the smartest shop upgrades a woodworker can tackle.
Key Takeaways
- A miter saw station eliminates wobbling, improves cut accuracy, and centralizes tool storage to transform your shop into an efficient production hub.
- Extended support wings at least 48 inches on each side, precise height alignment (36–38 inches), and integrated T-track or stop-block systems are essential features for repeatable, professional-quality cuts.
- Miter saw station plans can range from budget-friendly designs under $150 using construction lumber to premium setups over $400 with soft-close drawers and dedicated dust collection—choose based on your usage frequency and shop needs.
- Proper dimensions depend on your shop space and stock size; a 120-inch total width handles 8-foot boards, but fold-down wing designs reclaim floor space in tight garages.
- Integrated storage solutions—blade racks, labeled drawers, pegboard backsplashes, and dust collection ports—prevent tool hunting and keep workflow smooth during multi-hour projects.
Why Every DIYer Needs a Dedicated Miter Saw Station
A portable miter saw might handle the occasional baseboard install, but anyone running repetitive crosscuts or working with stock longer than four feet hits the limits fast. Without side support, boards tip mid-cut or need a helper holding the far end. The saw base itself offers minimal work surface, so layout, measuring, and assembly happen elsewhere, usually on sawhorses that aren’t quite level.
A miter saw station locks the saw at a fixed height and position, flanked by extension tables that support material from both sides. This setup eliminates deflection during cuts, which means cleaner miters and fewer do-overs. For trim carpenters, it’s the difference between coped joints that close tight and gaps that need caulk. For deck builders cutting composite or treated lumber, it means consistent board lengths without constant remeasuring.
Beyond cut quality, a station centralizes tool storage. Blade changes, stop blocks, clamps, and fasteners stay within reach instead of scattered across the bench or buried in drawers. Many designs incorporate dust collection ports that connect directly to a shop vac, keeping sawdust out of the air and off the floor. Safety improves, too: a stable platform reduces kickback risk, and dedicated space means the saw isn’t sharing a workbench with other projects that could interfere with the swing radius.
The ROI shows up fast. A weekend building the station pays off the first time a crown molding job finishes in half the expected time, or when a deck frame goes together without constant adjustments. It’s not glamorous, but it’s the kind of infrastructure that separates hobbyists from serious DIYers.
Essential Features to Include in Your Miter Saw Station Design
Not all miter saw stations deliver the same functionality. The best designs share a few non-negotiable features that handle real-world shop demands.
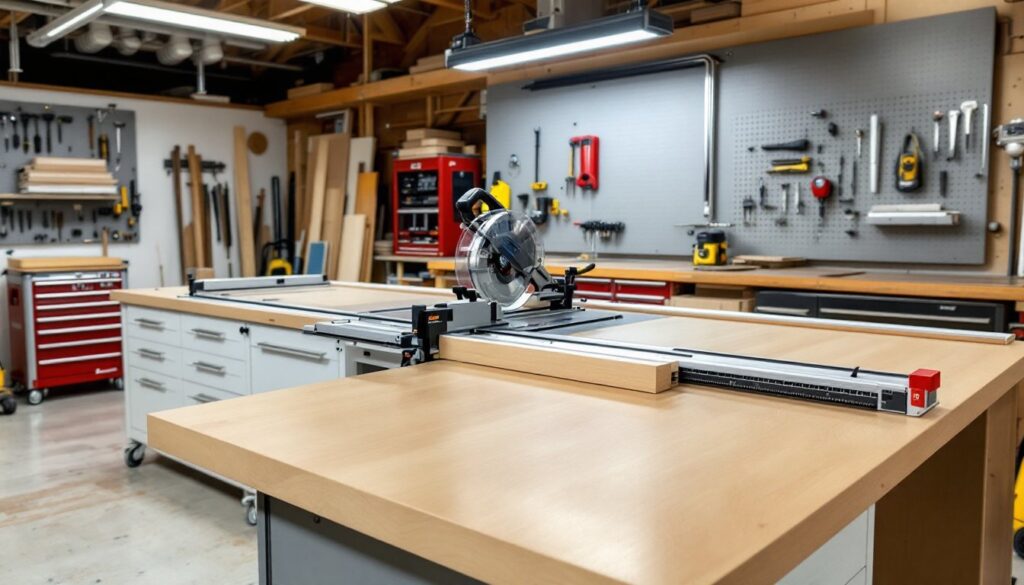
First, extended support wings on both sides of the saw. These tables should be dead level with the saw deck and run at least 48 inches in each direction, enough to support a full 8-foot board at center. For builders working with 10- or 12-foot stock regularly, 60-inch wings make more sense. The wings don’t need to be solid: many builders use MDF or melamine for a smooth, low-friction surface that won’t snag material during feeds.
Integrated stop blocks or a T-track system allow repeatable cuts without remeasuring every piece. A flip-stop mounted to the fence lets users cut multiples to identical length, critical for chair rails, deck railings, or any project with repetitive components. T-tracks also accommodate hold-downs and featherboards for angled cuts that might otherwise shift mid-pass.
Adjustable fences keep material square to the blade. Some plans call for a sacrificial fence, a strip of 3/4-inch plywood or MDF mounted in front of the factory fence, to prevent tearout and allow for zero-clearance inserts. This setup also lets users embed measuring tape directly into the fence face, indexed to the blade for quick length checks.
Storage matters as much as cutting capacity. Drawer banks or cubbies below the station hold extra blades, hex keys, push sticks, and safety glasses. Open shelves work for power tool cases or a dedicated spot for the shop vac that handles dust collection. Some builders add pegboard backsplash above the saw for hanging squares, clamps, and marking tools.
Finally, mobility vs. permanence depends on shop layout. A built-in station bolted to a wall maximizes stability, but rolling casters (locking, 3-inch swivel casters rated for at least 300 pounds per wheel) let users reposition the station or wheel it out of the way when floor space is tight. Retractable casters, where the station sits flat on the floor but lifts onto wheels via a foot lever, offer the best of both.
Choosing the Right Dimensions for Your Space
Measure the shop first, then design the station. A cramped setup causes more problems than it solves.
Start with saw footprint and swing clearance. A 10-inch sliding compound miter saw needs roughly 24 inches of depth when the carriage is fully extended, plus another 6 inches behind for motor clearance and blade guard swing. A 12-inch saw may require 28 inches. Add 4 inches in front for hand and wrist positioning during cuts. That’s a minimum 36-inch front-to-back depth for most setups.
Width depends on material handling. If the shop regularly processes 8-foot boards solo, a station width of at least 120 inches (10 feet) keeps both ends supported. For smaller shops or users who mostly work with shorter stock, a 72-inch total width (36 inches per side) handles most trim and small furniture projects. Note that width doesn’t have to be symmetrical, if the saw sits closer to a wall on one side, extend the opposite wing further.
Height is non-negotiable: the saw deck should sit at 36 to 38 inches from the floor for most users. This matches standard workbench height and keeps wrists neutral during cuts. Taller builders may prefer 40 inches: shorter users might drop to 34 inches. The key is that support wings match the saw deck exactly, even a 1/8-inch difference will hang up boards during feed.
Clearance around the station matters, too. Leave at least 48 inches behind the saw for the operator to move freely and clear long offcuts. If the station backs up to a wall, mount the saw on a hinged platform or leave enough gap to access the blade and bevel adjustments without disassembling the setup.
For workshops with limited square footage, consider a fold-down wing design where one or both extensions hinge upward when not in use. This sacrifices some rigidity but reclaims walkways in tight spaces. Use heavy-duty strap hinges and a locking brace to prevent sag when the wing is deployed.
Step-by-Step Guide to Building Your Miter Saw Station
Building a miter saw station doesn’t require cabinetmaking skills, but it does demand accurate measuring and square assembly. Most builders complete the project in a weekend.
Materials and Tools You’ll Need
Materials:
- (2) sheets 3/4-inch plywood (birch or cabinet-grade for work surfaces: construction-grade for internal frames)
- (1) sheet 1/2-inch MDF (for wing tops and sacrificial fences)
- (8) 2×4 studs (8 feet each, for base frame and leg assemblies)
- (1 box) 2-1/2-inch deck screws (for framing)
- (1 box) 1-1/4-inch pocket hole screws (for joining panels)
- Wood glue (Titebond II or equivalent)
- (4) locking swivel casters (if building a mobile version)
- (2) 36-inch measuring tapes (for fence indexing)
- Sandpaper (120- and 220-grit)
- Polyurethane or paste wax (for work surface finish)
Tools:
- Miter saw (the one you’re building the station for)
- Circular saw or table saw (for breaking down sheet goods)
- Drill/driver (18V cordless minimum)
- Pocket hole jig (Kreg or similar)
- Clamps (at least four 24-inch bar clamps)
- Combination square and 4-foot level
- Safety glasses, hearing protection, and dust mask
Build Sequence:
-
Cut the base frame. Rip 2x4s to create a rectangular frame matching your desired station footprint. Use half-lap joints at corners or pocket screws if speed matters more than aesthetics. Check diagonals to confirm square, measure corner to corner: both measurements should match within 1/8 inch.
-
Install legs and supports. Attach vertical 2×4 legs at each corner, plus one at the midpoint of longer spans. Cross-brace the legs with horizontal 2x4s for rigidity. If adding casters, mount them now and factor the added height into your final deck measurement.
-
Mount the miter saw. Cut a recess in the top panel so the saw deck sits flush with the surrounding surface. Most saws have mounting holes in the base: drill through the panel and bolt the saw down with 1/4-inch lag bolts and fender washers. Do not skip this step, a loose saw drifts during cuts.
-
Build and attach wing frames. Construct separate frames for each side extension using 2x4s, then top with MDF or plywood. Use shims or planer passes to bring wings exactly level with the saw deck. Check with a straightedge spanning from wing to wing across the saw.
-
Add the fence system. Mount a straight 2×4 or plywood strip behind the saw, parallel to the blade. Verify square with a framing square against the blade (unplug the saw first). Attach the sacrificial fence in front using screws from behind, so it’s replaceable.
-
Install T-tracks or stop blocks. Rout or mount T-track into the fence or wing tops. Position tracks parallel to the blade for stop blocks and perpendicular for hold-downs. Drill clearance holes, not pilot holes, T-track bolts need to slide freely for adjustment.
-
Finish surfaces. Sand all work surfaces to 220-grit, then seal with polyurethane or paste wax. This prevents moisture absorption and lets material slide smoothly during cuts.
-
Add storage. Build drawer boxes using 1/2-inch plywood and mount them on side-mount drawer slides beneath the wings. Open cubbies work fine if drawer hardware isn’t in the budget.
Many step-by-step DIY project tutorials showcase variations on this basic sequence, from ultra-simple designs to advanced stations with built-in dust collection and power strips. The process adapts easily to skill level and available materials.
Smart Storage Solutions and Organization Tips
A miter saw station that doesn’t organize the surrounding tools and consumables misses half the point. Efficient storage keeps workflow smooth and reduces time spent hunting for a hex key or fresh blade.
Blade storage deserves dedicated space. Extra blades, 60-tooth finish, 24-tooth rip, specialty dados, should hang on a blade rack mounted to the station’s side or back panel. Avoid tossing blades in a drawer where carbide tips chip against each other. Magnetic strips work for smaller blades but lack the protection of slotted racks.
Drawer dividers keep small parts sorted. Dedicate one drawer to fasteners (screws, brads, biscuits) with sections for each size. Another drawer holds measuring tools: combination square, speed square, marking knife, and pencil. A third drawer can store push sticks, featherboards, and blade wrenches. Label each section, it sounds obvious, but after a 10-hour trim marathon, even obvious helps.
Vertical storage above or beside the station handles longer tools. Mount a strip of 3/4-inch plywood with dowels for hanging clamps, or use pegboard with metal hooks for tape measures, extension cords, and safety glasses. Keep frequently used items at eye level: less common tools can go higher.
For builders working on job sites or rotating between home and rental properties, woodworking project plans often include fold-flat or modular station designs where storage compartments detach for transport. These sacrifice some capacity but maintain the core benefit of organized, accessible tool placement.
Dust management integrates into storage, too. Mount a dust collection bin or shop vac on a lower shelf with a quick-disconnect hose that reaches the saw’s exhaust port. Some builders route 4-inch PVC through the station base to a central dust collector, with a blast gate that opens only when the saw runs. Either approach beats sweeping sawdust after every cut.
Power and lighting round out the station’s utility. Install a surge-protected power strip on the back or side panel, positioned where cords won’t drape over the work surface. Add an LED shop light overhead, mounted to a shelf or the ceiling directly above the saw, to eliminate shadows on cut lines. A 4-foot, 4000-lumen LED fixture runs under $30 and makes layout marks visible even in dim garages.
Budget-Friendly vs. Premium Miter Saw Station Plans
Miter saw station builds range from under $100 to well over $500, depending on materials, features, and whether the builder already owns a scrap pile.
Budget builds (under $150) use construction-grade lumber and minimal hardware. A basic frame of 2x4s topped with a single sheet of 3/4-inch OSB or construction plywood delivers a functional station without frills. Skip the drawers and use open shelves or plastic bins for storage. Forgo T-tracks and use a clamped wooden stop block instead. This approach works for occasional users or DIYers who need a station now and can upgrade components later. Many beginner woodworking projects start here, proving that simple doesn’t mean ineffective.
Mid-range stations ($200–$350) step up to cabinet-grade plywood, add basic drawer slides, and incorporate one or two T-tracks for repeatable cuts. These builds often include casters for mobility and a coat of finish on work surfaces. Material quality improves accuracy, flatter panels mean fewer adjustments, and features like integrated dust ports and cord management appear. This tier suits most serious DIYers who use the saw weekly for trim, furniture, or outdoor projects.
Premium stations ($400–$600+) use hardwood plywood, full-extension soft-close drawer slides, multi-track fence systems, and dedicated dust collection hoods. Some builders add pneumatic tool storage with quick-connect fittings for nailers, router lifts for flush-trimming long stock, or even built-in miter saw stands that adjust height via a crank mechanism. These stations often integrate with a larger shop layout, matching existing cabinetry and incorporating electrical sub-panels for dedicated circuits. They’re overkill for hobbyists but worthwhile for contractors or woodworkers running a side business.
Cost variables to track: Sheet goods fluctuate with lumber markets, plywood that cost $45 per sheet in 2023 might hit $65 in 2026 depending on supply chains. Caster prices vary widely based on load rating: cheap casters fail under a 200-pound station plus a 60-pound saw. Drawer slides are the single biggest hardware expense: side-mount slides cost $8–$12 per pair, while full-extension undermount slides run $25–$40 per pair.
The sweet spot for most builders: a mid-range design using one sheet of quality plywood for surfaces, construction lumber for framing, and budget hardware for everything except casters and the most-used drawer. Upgrade components over time as needs evolve or as shop budget allows. A station that starts simple but leaves room for T-tracks, drawers, or fold-down wings beats a half-finished premium build that sits incomplete for months.