Table of Contents
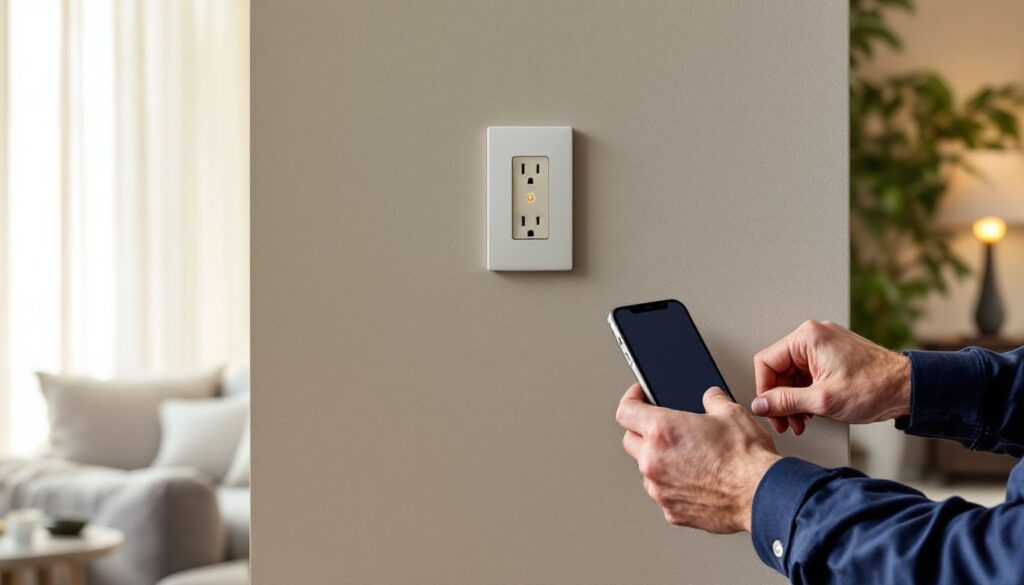
ToggleSmart home outlets replace standard receptacles with Wi-Fi-enabled versions that let homeowners control power remotely, schedule devices, and monitor energy use, all from a smartphone or voice command. They’re one of the most accessible entry points into home automation because installation requires basic electrical knowledge, zero rewiring behind walls, and less than twenty bucks in most cases. Unlike smart plugs that occupy outlet space, smart outlets integrate flush with the wall and maintain full receptacle capacity. For DIYers comfortable working with household wiring, swapping out a standard outlet takes about fifteen minutes per unit and delivers immediate functionality that works with existing devices already plugged in.
Key Takeaways
- Smart home outlets are Wi-Fi-enabled receptacles that let homeowners control power remotely, schedule devices, and monitor energy use—making them one of the most accessible entry points into home automation without rewiring.
- Installing smart outlets yourself takes about fifteen minutes per unit and requires only basic electrical knowledge, a non-contact voltage tester, and simple tools, with most jurisdictions allowing homeowner replacements as maintenance.
- Energy monitoring on equipped smart home outlet models reveals phantom loads and consumption patterns, helping homeowners identify which appliances waste power and potentially save $13+ monthly on devices like old refrigerators.
- Voice control integration with Alexa, Google Assistant, or Siri eliminates switch fumbling and works with existing ‘dumb’ devices—meaning your 2008 box fan becomes smart-enabled instantly without replacement.
- Scheduled automation reduces unnecessary appliance runtime by an average of 22% while providing safety features like space heater shutoffs and occupancy simulation that insurance companies recognize as reducing fire and theft claims.
- Choose smart outlets with UL or ETL certification marks, verify compatibility with your existing voice assistant ecosystem, and budget $25-30 for models with energy monitoring rather than risking cheap fire hazards that cost only $12-15.
What Are Smart Home Outlets and How Do They Work?
Smart outlets are hardwired receptacles that replace conventional 15-amp or 20-amp outlets in standard electrical boxes. Unlike traditional outlets that provide continuous power, smart versions include integrated Wi-Fi modules (some use Zigbee or Z-Wave protocols) that communicate with home networks and respond to app commands or voice assistants.
Most models connect to 2.4 GHz Wi-Fi networks, the 5 GHz band isn’t compatible with many smart home devices due to range limitations. Once connected, the outlet’s built-in relay can cut or restore power to one or both receptacles independently. Some split-receptacle designs let users control the top outlet via app while leaving the bottom always-on for essentials like alarm clocks.
The control mechanism is straightforward: the companion app sends a signal through the router to the outlet’s chip, which triggers a mechanical or solid-state relay. Latency is typically under two seconds for local network commands. Voice control through Alexa, Google Assistant, or Siri routes through cloud servers, adding a second or two depending on internet speed. Setting up wireless home automation systems starts with devices like these that don’t require hubs or complex configuration.
Power consumption is minimal, most smart outlets draw less than 1 watt in standby mode, equivalent to about $1 per year in electricity costs per outlet. That phantom draw is negligible compared to the energy monitoring and scheduling features they enable.
Key Benefits of Installing Smart Outlets in Your Home
Remote power control tops the list for most users. Forgot to turn off the curling iron? Kill power from the parking lot. Going on vacation? Schedule lamps to turn on at dusk and off at 11 PM to simulate occupancy. This isn’t just convenience, insurance companies recognize that monitored homes have fewer fire and theft claims.
Energy monitoring (on equipped models) shows real-time wattage draw and cumulative kilowatt-hour usage per outlet. Plug an old refrigerator into a monitoring-capable outlet and discover it’s pulling 150 watts constantly, that’s $13/month in many regions. Identifying phantom loads helps prioritize appliance upgrades or justifies unplugging devices when not in use. Many homeowners pursuing smart appliance efficiency start by measuring baseline consumption.
Voice control integration eliminates the need to fumble for switches. “Alexa, turn off the bedroom fan” works from bed without reaching for a phone. For users with mobility challenges, voice-activated outlets provide independence without requiring lamp modifications or adaptive switches.
Scheduled automation runs routines without daily input. Coffee maker powers on at 6:00 AM weekdays only. Window AC units shut off when outdoor temperature drops below 70°F (requires IFTTT or similar automation platform). Space heaters turn off after two hours as a safety cutoff. According to testing by Popular Mechanics, scheduled automation reduces unnecessary appliance runtime by an average of 22%.
No device replacement required, unlike smart bulbs or appliances, outlets work with existing “dumb” devices. That $15 box fan from 2008 becomes smart-enabled the moment it plugs in.
Top Features to Look for When Choosing Smart Outlets
Voice Assistant and App Compatibility
Not all smart outlets play nice with all ecosystems. Before buying, confirm compatibility with the voice assistant already in use. Alexa-certified devices are the most common, followed by Google Home compatibility. HomeKit-certified outlets work with Siri and Apple Home but typically cost $10-15 more due to Apple’s certification requirements.
Some outlets require proprietary apps that don’t integrate with other smart home platforms, a dealbreaker for users building cohesive automation routines. Look for models supporting IFTTT (If This Then That) or SmartThings if planning cross-device automations like “turn off all outlets when security system arms.”
App quality varies wildly. Read recent reviews specifically mentioning app stability, especially after firmware updates. A glitchy app turns a convenient upgrade into a frustration that requires electrical work to remove. Outlets from manufacturers with established smart home device ecosystems tend to receive better ongoing software support.
Energy Monitoring Capabilities
Not all smart outlets include energy monitoring, it’s often a premium feature adding $5-10 to the unit cost. If monitoring matters, verify the outlet reports real-time wattage and cumulative kWh usage, not just on/off status.
Monitoring accuracy within ±5% is acceptable for home use. Some budget models show wildly inaccurate readings below 10 watts, making them useless for tracking phantom loads. Reviews on sites like Digital Trends often include accuracy testing against Kill-A-Watt meters.
Data export or integration with energy dashboards helps track usage over time. A few models send monthly reports or integrate with utility demand-response programs that offer rebates for reducing peak-hour consumption.
DIY Installation: How to Install Smart Outlets Yourself
Safety first: Kill power at the breaker panel, not just the light switch. Use a non-contact voltage tester to confirm the circuit is dead before touching any wires. Wear safety glasses, wire ends can spring back when released from terminals.
Most jurisdictions allow homeowners to replace existing outlets without a permit since it’s considered maintenance, not new electrical work. Adding new circuits or increasing amperage requires permits and often a licensed electrician. Check local codes, some municipalities require GFCI or AFCI protection on all bedroom and living area circuits, which affects smart outlet selection.
Tools needed:
- Flathead and Phillips screwdrivers
- Needle-nose pliers
- Wire strippers
- Non-contact voltage tester
- Flashlight or headlamp
Step-by-step installation:
-
Turn off power at the breaker. Flip the breaker off and test the outlet with a lamp or phone charger to confirm it’s dead.
-
Remove the old outlet. Unscrew the cover plate, then remove the two screws holding the outlet to the electrical box. Gently pull the outlet out, you’ll have 3-4 inches of wire to work with in a standard box.
-
Identify wires. Standard residential wiring includes a black (hot) wire, white (neutral) wire, and bare copper or green (ground) wire. Some boxes contain multiple cables if the outlet is mid-circuit, that’s normal.
-
Disconnect old outlet. Loosen terminal screws and remove wires. If wires are pushed into back-stab holes instead of wrapped around screws, cut them off flush and strip 3/4 inch of fresh insulation. Back-stab connections are code-legal but prone to loosening over time, screw terminals are more reliable.
-
Connect the smart outlet. Match wire colors to terminal screws: black to brass (hot), white to silver (neutral), green/bare to green (ground). Form a hook with needle-nose pliers and wrap clockwise around the screw so tightening pulls the wire tighter. Secure connections by tightening screws until wire is snug but not deforming.
-
Tuck wires and secure. Fold wires accordion-style into the box. Smart outlets are slightly deeper than standard outlets due to the Wi-Fi module, if the box is shallow (less than 1½ inches deep), the outlet may not sit flush. Push firmly and drive mounting screws into the box’s threaded ears.
-
Restore power and configure. Flip the breaker back on. The outlet’s LED should blink, indicating setup mode. Follow the manufacturer’s app instructions to connect to Wi-Fi, this usually involves creating an account, scanning a QR code, and selecting your network.
Common mistakes include reversing hot and neutral (works but creates shock hazards), over-tightening screws (cracks plastic housings), and forcing oversized wire bundles into shallow boxes. If the outlet feels warm during use or the LED blinks erratically, shut off power and recheck connections. Installing smart home devices for apartments often requires temporary installations, smart plugs may be better for renters who can’t modify wiring.
Best Smart Outlets for Different Home Needs
For whole-home automation: Models supporting Zigbee or Z-Wave protocols integrate with hubs like Samsung SmartThings or Hubitat, enabling local control that works even when internet goes down. These typically cost $30-45 per outlet but provide faster response times and better reliability than Wi-Fi-only models. Tom’s Guide recommends hub-based systems for homes with more than ten smart devices.
For renters or quick upgrades: Skip hardwired outlets and use smart plugs instead, they require zero installation and move with you. Trade-off is they’re bulkier and block adjacent outlets. For permanent installations where aesthetics matter, hardwired outlets maintain clean wall profiles.
For energy monitoring: Look for outlets with real-time wattage display in the app and historical data logging. Models from manufacturers like Emporia or Kasa HS300 provide detailed charts showing daily, weekly, and monthly usage patterns. This data is invaluable when diagnosing high electric bills or deciding which appliances to upgrade.
For high-wattage devices: Standard smart outlets are rated for 15 amps (1,800 watts) continuous load. Space heaters, window AC units, and power tools can approach or exceed this, verify the outlet supports 20-amp circuits if needed. Installing a 15-amp outlet on a 20-amp circuit is code-legal but the outlet becomes the limiting factor. Heavy-duty models with 20-amp ratings cost $10-15 more.
For outdoor use: Standard smart outlets aren’t weatherproof. Outdoor-rated models with NEMA 3R or higher enclosures protect against rain and dust. These mount in weatherproof boxes (often replacing existing GFCI outlets) and control landscape lighting, fountains, or holiday decorations. Expect to pay $40-60 for outdoor-rated models.
For seniors and accessibility: Voice-controlled outlets eliminate the need to bend down or fumble with switches. Pair with devices designed for seniors like automated lighting schedules that prevent nighttime falls, or remotely monitored outlets that alert family members if daily routines (like the coffee maker turning on) don’t occur as expected. Understanding how to secure smart home devices becomes especially important for vulnerable users who may be targets for scams or hacking.
Budget picks: Basic Wi-Fi outlets without energy monitoring start around $12-15 per unit. These work fine for simple on/off control of lamps and fans. Spending $25-30 adds monitoring, USB charging ports, or dual independent outlets.
Avoid off-brand models from unknown manufacturers, smart outlets stay powered 24/7 for years, and cheap components in electrical devices are fire hazards. Stick with brands that have UL or ETL certification marks physically stamped on the device (not just mentioned in marketing materials). Certified outlets have undergone third-party safety testing for electrical and fire risks.